Basic Manual settings for cool visual effects.
A Little About Exposure: Exposure is the amount of light a digital camera's sensor captures when a photo is taken. Too much light results in a washed out photo (overexposed). Too little light and the photo will be too dark (underexposed). A camera's Aperture, Shutter Speed and ISO settings directly affect exposure, but more importantly, they allow you to control how each photo will look.
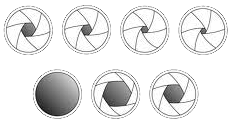
Aperture - Control the amount of blur or sharpness around your subject.
What it is and what it does: The aperture setting controls the size of the lens opening that allows light into your camera. You can blur the foreground and background that bracket your subject (known as shallow depth of field) by opening up the aperture with a low f-stop number; alternatively, you can keep your photo sharp from the foreground through to the background (known as wide depth of field) by closing the aperture down with a high f-stop number.


Aperture: f/2.8
Foreground and background blur make the subject stand out. Great for portraits.

Aperture: f/22
The subject, foreground and background are sharp. Perfect for landscape shots.
Shutter Speed - Show the movement of a fast moving subject or freeze it in action.
What it is and what it does: The only thing between the light that has passed through the Aperture and the image sensor is a shutter. The Shutter Speed setting controls how long the shutter opens to expose the image sensor to that light. Open it for just a millisecond and you can freeze a fast moving subject. Alternatively, you can show the movement of a fast moving subject by keeping it open longer with a slow shutter speed.
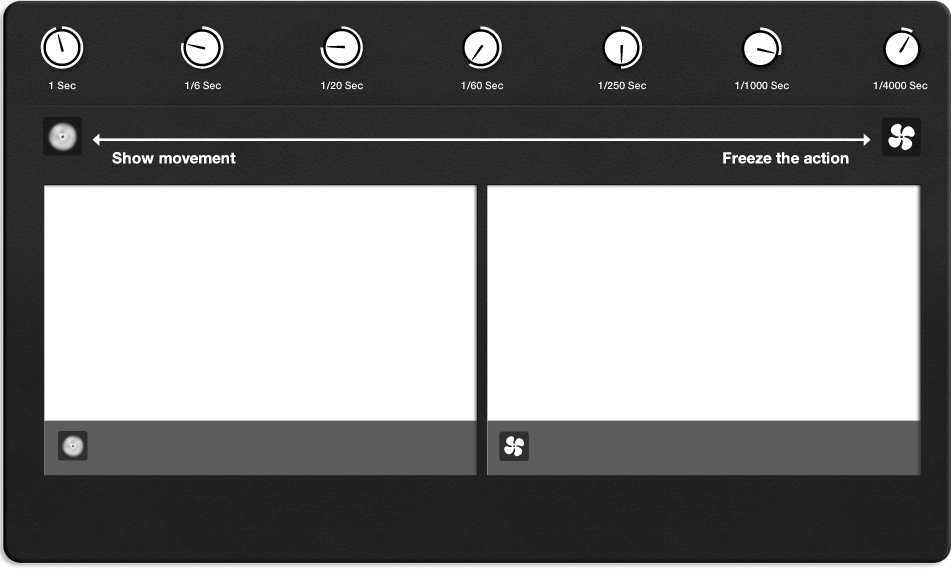

Shutter Speed: 1/250 sec
The movement of the propeller has been captured with a ghosting effect. Great for stunning images of streams and waterfalls.

Shutter Speed: 1/4000 sec
Even though it's moving the propeller looks frozen. Perfect for sports action shots.
ISO -Sense the right amount of light for the visual effect you want.
What it is and what it does: With the ISO setting a camera's image sensor can be adjusted to detect more, or less light as needed for a good exposure. On a bright sunny day too much light hitting the sensor can cause an overexposure so make it less sensitive with a low ISO number. If your shooting conditions are dark the sensor needs to detect more light so increase its sensitivity with a higher ISO. High ISO will cause graininess so as a rule use the lowest ISO possible. The photo effects you want to achieve with the aperture and shutter speed will impact the amount of light reaching the sensor, so use the ISO to adjust its sensitivity and get a good exposure.
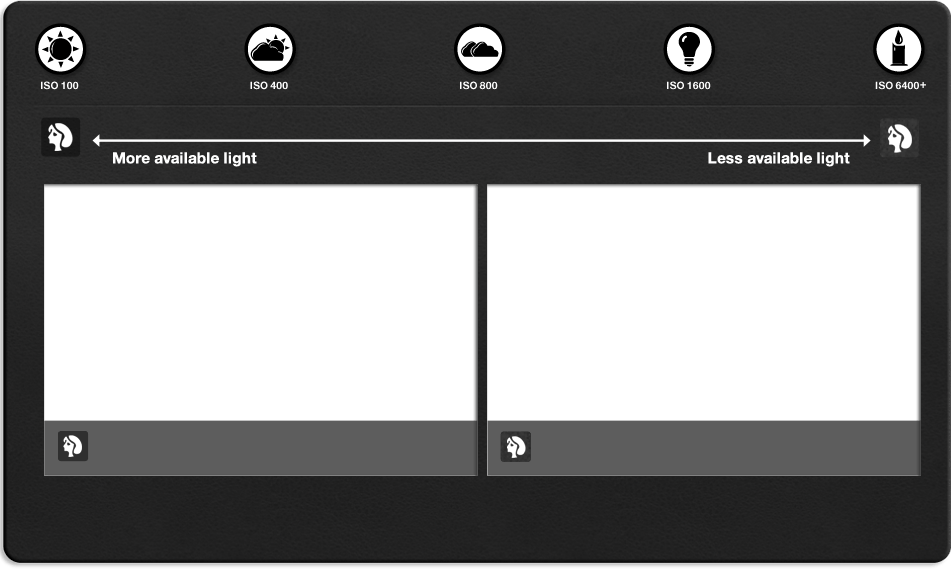
ISO: 100
Shooting indoors with a low ISO means you will need more light to reach the sensor. Get more light to the sensor by opening your aperture and/or slowing your shutter speed. Low ISO is ideal for shots under bright sunlight.

ISO: 25,600
Shooting indoors with such a high ISO means you will need less light to reach the sensor. Reduce the amount of light reaching the sensor by narrowing your aperture and/or using a fast shutter speed. High ISO is ideal for night photography.
Exposure Meter- Sanity check your settings.
What it is and what it does: The Exposure Meter is your final check before you snap a shot. At a glance it tells you how your exposure will turn out based on the Aperture, Shutter Speed and ISO settings. A well exposed shot lines up right down the centre at zero. An underexposed shot (too little light) falls left of centre and an overexposed shot (too much light) falls right of centre. Use the Exposure Meter as a guide only, exposure is a matter of personal preference so don't be afraid to wander off of zero.
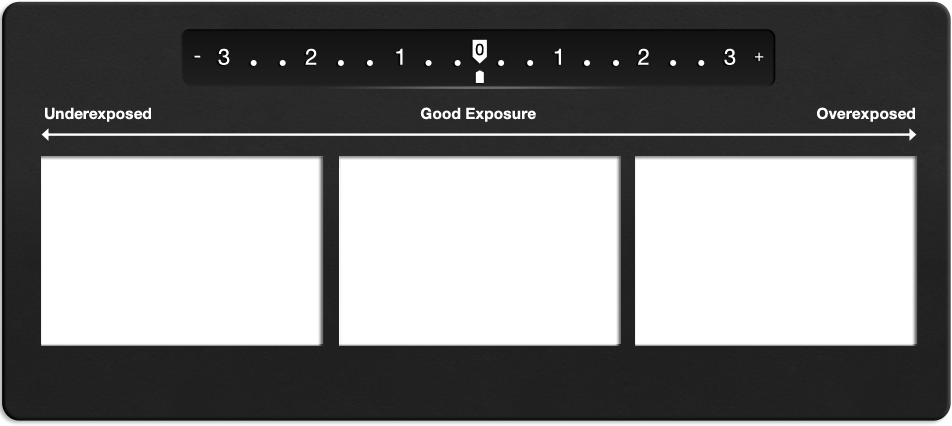

Underexposed: -3
Good Exposure: 0

Overexposed: +3